.::Abstract::.
Well, from the top. First, if you are using 95/98/ME, then you can, by all means follow this tutorial
but don't expect it to be a good experence. 9x isn't famed for good uptimes and stability.
As for those who feel like sending off an e-mail of hate saying 'You should use Linux/BSD/etc', stop.
I don't want to hear it. This guide is about Windows. Not Linux/BSD/etc.
Any time I use a variable that you can change, I shall make it bold and underlined.
That should make it easy to follow this tutorial.
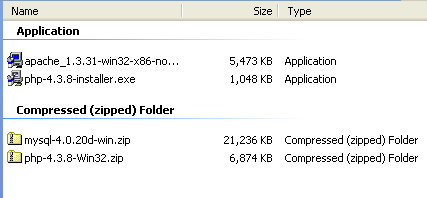
Ok, first we need to get our binaries. You will need:
* Apache (current stable is 1.3.34)
* PHP (current stable is 4.4.2 [Note: we will be getting both installer and Zip to be explained later])
* MySQL (current stable is 4.0.26)
* A good text editor. Yes, you can do this in notepad if you really must, but I use TextPad.
Step 1: Getting started.
Step 2: Installing Apache.
Step 3: Installing MySQL.
Step 4: Installing PHP.
Step 5: Configuring Apache.
Step 6: Finishing Up.
.::Step One: Getting Started::.
This is the easy part. I will now guide you on which installs to get and so on.
Lets start with Apache.
Apache Resides at its page here: http://httpd.apache.org/
You can get the Apache 1.3.34 install from here: Apache Installer
Now we go and get MySQL.
MySQL is located on the internet here: www.mysql.com
You can download the 4.0 version we will be using here: MySQL Installer
At 23MB, the installer is not light weight! However, its very essential for doing anything that requires a decent database backend
Now we finaly grab PHP.
PHP is located on the internet here: www.php.net
This isn't as evident as it looks, as we will be grabbing both the Windows Installer version and the Zip instal version, but all will become clear.
You can get PHP 4.4.2 from here: Windows Installer
And you will need the Zip version here: Zip Installer
You now have all the files you need to start the install, so proceed to Step Two.
.::Step Two: Installing Apache::.
Apache is rather simple and straight forward to install. Start by clicking on the install file, located to wherever you downloaded it to.
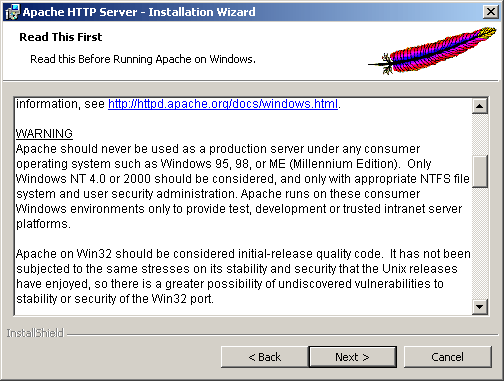
Click next and agree with the license (if you agree that is). Next, have a quick read of the next screen that appears. This contains a bit more background about what Apache HTTP Server is about, where the documentation is, and also a small warning:
On the next screen, you are confronted with some boxes. It is important that this is filled in right, as getting it wrong can be a bit stupid to say the least...
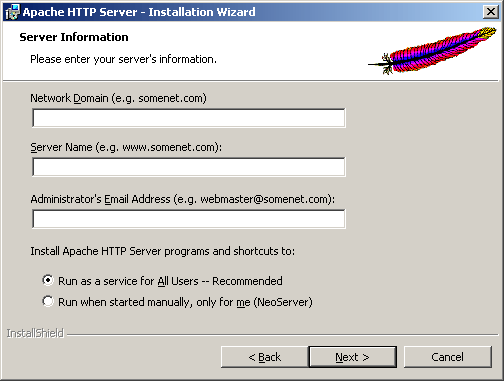
The network domain and server name are almost entierly up to you with a small exception.
You have to have a DNS that points back to you to be able to use a www.something.com style network domain. Most people don't have this, but you can get some software that allows you to have a dynamic IP attached to a DNS. So three values can go in here.
| Option | Value |
|---|---|
| Network Domain | Either: Your Local IP (for testing, no outside access) E.G. 192.168.1.5 Your Internet facing IP if it is static. Its no good puting a dynamic IP here. Your DNS entry. |
| Server Name | Either: A non url style value Your static IP Or your DNS entry |
| Administrator's Email Address | Your E-mail Address |
Finaly, the Option to run the program should be on the all users by default, change it so that it is if otherwise.
Click next. Both Complete and Custom can be chosen, for speed, just choose Complete (for some reason there are only two options in Custom)
Upon clicking next, you are presented with an option to change the Apache location. For most, if not all users, this location is fine.
Click next, then click Install. Apache will now be installed.
Thats it. Apache is now fully installed. Move on to step Three; Installing MySQL
.::Step Three: Installing MySQL::.
The one that comes in the biggest install has few things to offer the user choice wise.
Upon opening the Zip, you need to locate SETUP.EXE - click it to start the install.
Change the install directory if you so wish, but the default one is good enough.
Install using complete, as most options can be installed.
Let it do its job, and thats MySQL installed.
Yes. Finished.
Yes. Done.
Yes, boring. :)
Continue on to Step Four: Installing PHP
.::Step Four: Installing PHP::.
Ok, you should have both the windows installer and the zip version of PHP. We will be using the windows installer first, so go and fire that up.
Most, if not all of any options can be left out. If it asks for address of SMTP server, just leave the values there for now.
The only screen that needs an option to be chosen is the screen that asks what HTTP server type we are using. Select Apache.
Click through any remaing windows, and let the installer do its job. It then comes up with this:
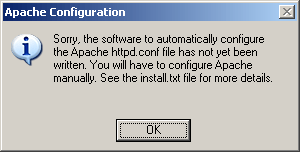
Click ok, and it will tell you that PHP has been sucessfully installed.
What good is the software alone if we haven't configured it?
Lets do so now! Move on to Step 5: Configuring Apache to use PHP.
.::Step Five: Configuring Apache::.
I really should of broken this up into two parts, but what the heck, lets do it in one. We are going to configure apache as well as configure PHP at the same time.
Get yourself a good text editor. Now hunt and edit the httpd.conf file.(located in [your Apache install directory]/conf/httpd.conf)
For ease of use, and simplicity, I always create a folder in my C:\ drive called DocumentRoot and use that as my Apache document root. Its never failed me as a setup
The first thing you should hunt out is line 301, which contains the DocumentRoot option. I shall be changing this to C:/DocumentRoot however, the choice is yours as of to what you want.
Code:
296	#
297	# DocumentRoot: The directory out of which you will serve your
298	# documents. By default, all requests are taken from this directory, but
299	# symbolic links and aliases may be used to point to other locations.
300	#
301	DocumentRoot "C:/DocumentRoot"
Line 326 will also need changing to what you change line 301 to.
Code:
323	#
324	# This should be changed to whatever you set DocumentRoot to.
325	#
326	<Directory "C:/DocumentRoot">
Line 505 can be changed so that your logs are more detailed. This will allow you to use programs that track users to and from your site. You need to change the word 'common' to 'combined' to enable this
Code:
498	#
499	# The location and format of the access logfile (Common Logfile Format).
500	# If you do not define any access logfiles within a <VirtualHost>
501	# container, they will be logged here.  Contrariwise, if you *do*
502	# define per-<VirtualHost> access logfiles, transactions will be
503	# logged therein and *not* in this file.
504	#
505	CustomLog logs/access.log combined
Thats it for basic configuration, now we need to enable PHP
Now, for secuirty and speed, we are going to enable PHP as a module in apache.
Copy php4ts.dll to the windows/system (for Windows 9x/Me),
winnt/system32 (for Windows NT/2000) or windows/system32 (for Windows XP) directory,
overwriting any older file.
Now, open (if its not already) the httpd.conf file.
locate the LoadModule directive and add the following line at the end of the list for PHP 4:
LoadModule php4_module "c:/php/sapi/php4apache.dll"
Code:
177	#LoadModule vhost_alias_module modules/mod_vhost_alias.so
178	#LoadModule mime_magic_module modules/mod_mime_magic.so
179	#LoadModule status_module modules/mod_status.so
180	#LoadModule info_module modules/mod_info.so
181	#LoadModule speling_module modules/mod_speling.so
182	#LoadModule rewrite_module modules/mod_rewrite.so
183	#LoadModule anon_auth_module modules/mod_auth_anon.so
184	#LoadModule dbm_auth_module modules/mod_auth_dbm.so
185	#LoadModule digest_auth_module modules/mod_auth_digest.so
186	#LoadModule digest_module modules/mod_digest.so
187	#LoadModule proxy_module modules/mod_proxy.so
188	#LoadModule cern_meta_module modules/mod_cern_meta.so
189	#LoadModule expires_module modules/mod_expires.so
190	#LoadModule headers_module modules/mod_headers.so
191	#LoadModule usertrack_module modules/mod_usertrack.so
192	#LoadModule unique_id_module modules/mod_unique_id.so
193	LoadModule php4_module "c:/php/sapi/php4apache.dll"
194	#^^Add this line here, its not there by default.
But wait! you cry. I don't have the /sapi/php4apache.dll!
Well, remember I asked you to get the Zip version of PHP as well? This is why! Go and open the Zip of PHP, and locate the php4apache.dll file.
Then, create the directory /SAPI/ in your PHP install directory (default: C:\PHP). Then do the above edit.
you need to define the AddModule directive for mod_php4.c. This is especially important if the ClearModuleList directive is defined, which you will find by scrolling down a few lines. You will see a list of AddModule entries, add the following line at the end of the list: AddModule mod_php4.c
Finally, come down to about line 816. You will see some AddHandler entries, add the following line at the end of the list: AddHandler application/x-httpd-php .php. You can choose any extension you want to parse through PHP here. .php is simply the one I suggest.
I also like to add this: AddHandler application/x-httpd-php-source .phps so that I can show people my code.
Code:
816    #
817    # AddHandler allows you to map certain file extensions to "handlers",
818    # actions unrelated to filetype. These can be either built into the server
819    # or added with the Action command (see below)
820    #
821    # If you want to use server side includes, or CGI outside
822    # ScriptAliased directories, uncomment the following lines.
823    #
824    # To use CGI scripts:
825    #
826    #AddHandler cgi-script .cgi
827    #added lines here:
828    AddHandler application/x-httpd-php .php
829    AddHandler application/x-httpd-php-source .phps
Now, restart apache (via net stop apache | net start apache on NT/2K/XP, or via the shortcuts in 9x).
Continue on to step Six: Finishing Up.
.::Step Six: Finishing Up::.
To test that you got it all right, you now need to check both apache and PHP at once...
Create a file in your document root called phpinfo.php, and add this line of script:
Code:
1	<?php phpinfo(); ?>
Now, whip the browser out, and navigate to http://localhost/phpinfo.php
If all goes well, you should see the PHP info page. Don't close it, we need to check some values first...
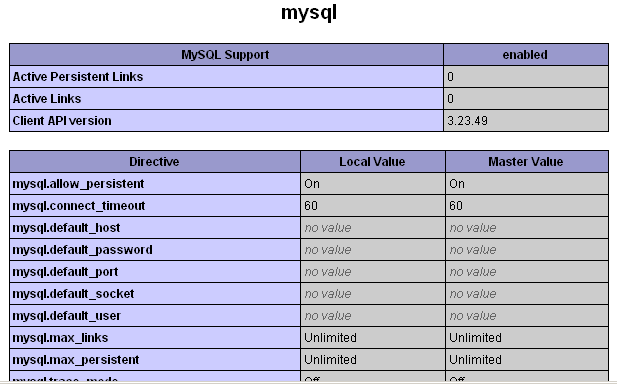
You need to scroll down till you see the section called mysql. IF that is found, then everything is perfect. You have installed Apache, PHP and MySQL.
.::End Of Tutorial::.
Was this tutorial helpfull? Did I miss anything? If so, please E-mail me.
NeoThermic/This Tutorial © 2001-2005. ® All rights reserved.
Apache, MySQL and PHP are copyrighted by their owners, The Apache Software Foundation, The PHP Group, MySQL AB, respectivly. Each has All Rights Reserved.
