Having seen so many people in #remote-exploit trying their best to get Backtrack 3 working with Intel's wireless chipsets, mainly the 3945ABG, I decided to write a quick-howto. Lets start by saying it's not quite easy. The default driver for Intel 3945 chipsets can do normal wireless stuff, but can't inject. The injection driver can't do normal wireless stuff. So you have to pick your tasks, and thus which driver to use, carefully.
In this brief guide I'll show you the quick way of getting over to the injection driver, finding a network in kismet and throwing wesside-ng at it to obtain the key. Then I'll show how to swap back over and connect to the network you've just pen-tested.
So, how do you know this guide is for you? A nice quick way is to do
You'll get something like:
Code: Select all
02:00.0 Network controller: Intel Corporation PRO/Wireless 3945ABG Network Connection (rev 02)
If so, move on, you're doing well.
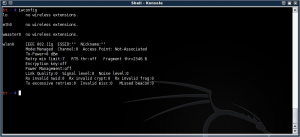
The first thing to note is that the default driver for this card is called `iwl3945`. Using an `iwconfig` will get you something like:
airmon-ng tells us:
Code: Select all
Interface	Chipset		Driver

wlan0			iwl3945 - [phy0]
If you were to try tell airmon-ng to enable monitor mode on wlan0, you'd get an error like:
Code: Select all
/usr/local/sbin/airmon-ng: line 338: /sys/class/ieee80211/phy0/add_iface: Permission denied
mon0: ERROR while getting interface flags: No such device
So you need to do the following:
Code: Select all
# modprobe -r iwl3945
# modprobe ipwraw
Then do an iwconfig, and you'll see this...
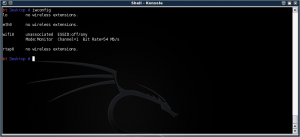
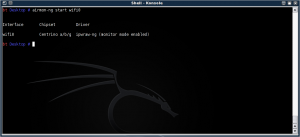
This wifi0 device can go into monitor mode:
Now to find your network to pen-test (and of course, only do this on hardware you own. In this case we're going to use the BT Home Hub we have here).
First edit /usr/local/etc/kismet.conf in you fave editor. We're only going to change a single line, so no need to load anything fancy (I myself use nano, but use what you'd like)
Scroll down to the "source=" line. You'll want to alter the source line to read something like:
Save your changes, and start kismet. Find the network you're looking for (pressing 's' and then 'f' for first-seen sort order), then press 'i' to get the following info:
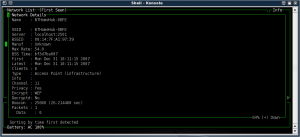
Note down the MAC address of the router, exit kismet.
Now the fun part. wesside-ng takes the tedious work out of getting all the IV packets and running aircrack-ng on them to get the key. To use wesside-ng:
In our case, we'll put in the BSSID of the target network, 00:14:7F:A1:97:39.
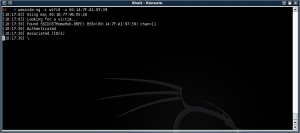
Here's wesside-ng after successful authentication:
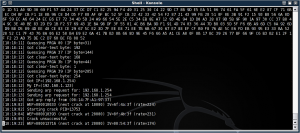
Here we're cracking the key:
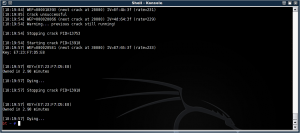
Tada, it found the test key, E723F7D5E8 (Yes, it's a 64-bit key for speed and testing).
Now we need to prove this is correct. Reverse the drivers:
Code: Select all
# modprobe -r ipwraw
# modprobe iwl3945
Fire up your chosen network finder (The wireless assistant will suffice here), find the network in question and click "connect". Enter in the key we just found.
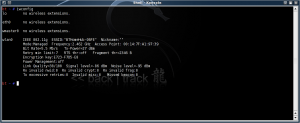
There we go, success:
I hope this helps those who are stuck getting the Intel card to inject.
Having seen so many people in #remote-exploit trying their best to get Backtrack 3 working with Intel's wireless chipsets, mainly the 3945ABG, I decided to write a quick-howto. Lets start by saying it's not quite easy. The default driver for Intel 3945 chipsets can do normal wireless stuff, but can't inject. The injection driver can't do normal wireless stuff. So you have to pick your tasks, and thus which driver to use, carefully.
In this brief guide I'll show you the quick way of getting over to the injection driver, finding a network in kismet and throwing wesside-ng at it to obtain the key. Then I'll show how to swap back over and connect to the network you've just pen-tested.
So, how do you know this guide is for you? A nice quick way is to do
[code]lspci | grep 3945ABG[/code]
You'll get something like:
[code]02:00.0 Network controller: Intel Corporation PRO/Wireless 3945ABG Network Connection (rev 02)[/code]
If so, move on, you're doing well.
The first thing to note is that the default driver for this card is called `iwl3945`. Using an `iwconfig` will get you something like:
[url=https://neothermic.com/Images/iwconfig_iwl3945.png][img]https://neothermic.com/Images/thumbs/iwconfig_iwl3945.png[/img][/url]
airmon-ng tells us:
[code]Interface Chipset Driver
wlan0 iwl3945 - [phy0][/code]
If you were to try tell airmon-ng to enable monitor mode on wlan0, you'd get an error like:
[code]/usr/local/sbin/airmon-ng: line 338: /sys/class/ieee80211/phy0/add_iface: Permission denied
mon0: ERROR while getting interface flags: No such device[/code]
So you need to do the following:
[code]# modprobe -r iwl3945
# modprobe ipwraw[/code]
Then do an iwconfig, and you'll see this...
[url=https://neothermic.com/Images/iwconfig_ipwraw.png][img]https://neothermic.com/Images/thumbs/iwconfig_ipwraw.png[/img][/url]
This wifi0 device can go into monitor mode:
[url=https://neothermic.com/Images/airmon_ng_start_wifi0.png][img]https://neothermic.com/Images/thumbs/airmon_ng_start_wifi0.png[/img][/url]
Now to find your network to pen-test (and of course, only do this on hardware you own. In this case we're going to use the BT Home Hub we have here).
First edit /usr/local/etc/kismet.conf in you fave editor. We're only going to change a single line, so no need to load anything fancy (I myself use nano, but use what you'd like)
Scroll down to the "source=" line. You'll want to alter the source line to read something like:
[code]source=iwl3945,wifi0,Intel[/code]
Save your changes, and start kismet. Find the network you're looking for (pressing 's' and then 'f' for first-seen sort order), then press 'i' to get the following info:
[url=https://neothermic.com/Images/kismet_bthomehub.png][img]https://neothermic.com/Images/thumbs/kismet_bthomehub.png[/img][/url]
Note down the MAC address of the router, exit kismet.
Now the fun part. wesside-ng takes the tedious work out of getting all the IV packets and running aircrack-ng on them to get the key. To use wesside-ng:
[code]wesside-ng -i wifi0 -v {BSSID}[/code]
In our case, we'll put in the BSSID of the target network, 00:14:7F:A1:97:39.
Here's wesside-ng after successful authentication:
[url=https://neothermic.com/Images/wesside_assoc.png][img]https://neothermic.com/Images/thumbs/wesside_assoc.png[/img][/url]
Here we're cracking the key:
[url=https://neothermic.com/Images/wesside_cracking1.png][img]https://neothermic.com/Images/thumbs/wesside_cracking1.png[/img][/url]
Tada, it found the test key, E723F7D5E8 (Yes, it's a 64-bit key for speed and testing).
[url=https://neothermic.com/Images/wesside_cracked.png][img]https://neothermic.com/Images/thumbs/wesside_cracked.png[/img][/url]
Now we need to prove this is correct. Reverse the drivers:
[code]# modprobe -r ipwraw
# modprobe iwl3945[/code]
Fire up your chosen network finder (The wireless assistant will suffice here), find the network in question and click "connect". Enter in the key we just found.
There we go, success:
[url=https://neothermic.com/Images/iwconfig_bthomehub1.png][img]https://neothermic.com/Images/thumbs/iwconfig_bthomehub1.png[/img][/url]
I hope this helps those who are stuck getting the Intel card to inject.